Home Back to tutorials page
Jump Ring Soldering Basics
Soldering
Soldering is a means of permanently attaching two metals by heating the metal pieces and melting a solder material that permanently fuses the metal pieces together. It differs from welding in that metals are welded by melting them so that they flow together and fuse without the use of solder.
Solder Temperaments
Solder usually comes in multiple temperaments: hard, medium, easy, extra-easy and low temperature. Hard solder melts at the highest temperature and low temperature melts at the lowest temperature. These different types are used when soldering a piece that requires several solderings . For example, you might use hard solder to solder a bezel wire closed, medium to attach the bezel to the base and easy to attach the bail. Each subsequent soldering should be done at a lower temperature so that the heat does not melt the previous solder. If you are just soldering jump rings, extra easy is usually fine.
Note on low temperature solders:
When two pieces are joined together with solder, the heat from the torch causes the molecules to expand and allows the solder to flow in among the molecules. When the piece is cooled, the molecules contract and the two pieces are permanently fused together.
Some of the extra low temperature solders melt at such a low temperature that the molecules do not have the opportunity to expand as much, and the result is that the two pieces are bonded by solder, but are not fused as well as with higher temperature solders. For some applications, such as closing jump rings, this is fine.
Solder Color
The melting point of each temperament is controlled by adding other materials to the silver. The hard solder contains the most silver and extra-easy contains the most additives. Consequently, the color of the hard solder will most closely match the silver. The advantage of the extra-easy is that it is much easier to use, but the disadvantage is that it does not match as closely. For parts such as pin-backs that are not visible, matching the color exactly is not as important.
Solder Types
Solder comes in different types, such as sheet, wire and paste. They are used for different applications, and for some people, the type they use is just a matter of personal preference. Sheet solder is used by cutting a sheet into tiny squares and placing the squares at the joint to be soldered (the place where the two pieces to be soldered come together is usually referred to as the joint', even though they don't move'). Wire solder is used by touching the wire to the heated joint. It may also be used by cutting tiny snips of the wire and placing them at the joint just as you do with sheet solder. Paste solder can be spread at the place that you want to solder, although it is sometimes hard to get just a tiny amount of paste where you need it. Some paste solders do not require the use of flux (see below).
Flux
Solder must have an agent to assist its flow into the joint. Many different flux types are available, but a common type is made of borax. In addition to assisting the flow, fluxes can help prevent oxidation or fire-scale during the soldering process. Flux is placed (brushed, sprayed, dripped) into the joint prior to heating. Some solders are sold with their own recommended flux.
Generally, solder will not flow to an area where there is no flux. Some people flux the entire piece they are soldering to help prevent fire-scale
Pickle
In most cases, the item being soldered will get some oxidation or fire-scale. Pickle is an acidic compound used to remove the oxidation. It usually comes in a power form that is dissolved in water. After soldering, the entire piece is usually placed into the pickle solution and allowed to stay there for a few minutes.
Pickle is usually heated in a pickle pot. Crock pots may be used as well as the little potpourri pots. Heating the pickle speeds the process. Pickle will usually still work without being heated, but it may take longer (like several minutes instead of just seconds) to remove the oxidation. In some cases, such as pieces that contain glass beads, you should not heat the pickle, as the glass could break if you drop the item into hot pickle solution.
When removing the item from the pickle, only copper tongs should be used. Other types of metal may contaminate the pickle so that their molecules may plate to the next item to be pickled.
Note: Only use pickle if you are using sterling silver. Do not use pickle on silver-plated items. The pickle actually removes the oxidation by removing a tiny layer of the silver. On silver-plated items, this may remove the silver layer and allow the base metal to show through.
Solder Properties
There are two very important things to remember about solder:
Solder does not fill gaps . Repeat: Solder is not a gap-filling agent. The two pieces to be soldered together must butt cleanly up against each other. Then, when heated, the molecules of the two pieces will expand and allow the solder molecules to flow among them. When the piece cools off, the two pieces are fused together. If the pieces do not touch, the solder will melt and flow to one piece or other (or both), but the pieces will not fuse. If you are soldering jump rings, they must closed as cleanly and carefully as you would close them if you were not going to solder them.
Solder flows towards the heat . Solder flows towards the hottest part of the joint that is being heated. The 2 parts that are being soldered should be heated evenly. Otherwise, if one side is heated more than the other, the solder will flow to the hottest side and may not completely fill the joint. This is useful to know if you have a blob of solder that is not exactly where you want it. If you heat only the area where you want the solder to go, the solder will flow to that area. If, for example, you are soldering a ring closed and you have solder on the inside of the ring that does not come all the way through to the outside, just turn the ring over and heat the outside and the solder will flow on through the joint to the other side.
Solder Melt and Flow
When the solder is heated it will eventually begin to melt. You can tell that it is melting when it takes on a liquid look. It may take several seconds to a minute for the solder to reach the melting point. After the solder melts, the next step is flow'. When the solder flows, it does it very rapidly (in a fraction of a second). As soon as the solder flows, the heat should be removed.
Silver Melt
Watch the silver carefully while you are soldering. If it turns orange, the heat is too high. Sometime you may want to melt a piece just to see what happens during the melting process. First, the piece turns orange or a rosy color. After that, the piece suddenly takes on a silvery-liquid look. Immediately after that, the piece will melt. Watch carefully and if the piece begins to take on an orange glow, remove the heat for a few seconds and try to determine why the piece is overheating before the solder melts.
Soldering Blocks
Different materials may be used to solder on, but Solderite boards and charcoal blocks have properties that aid the soldering process. Charcoal blocks reduce the oxygen in the area being soldered, thus reducing oxidation. They both hold the heat and will help heat a piece more evenly for soldering. Other things like fiber boards or blankets may also be used, but they are not designed for holding heat.
Soldering Jump Rings
Use jump rings that have ends that fit together cleanly. If you are creating your own jump rings, the wire should be wound around a dowel and then cut with a jewelers saw to ensure that the ends are perfectly flat. You should not wind the wire around a dowel and then clip it with wire cutters, as most wire cutters will leave at least one and maybe both ends with an end that is crimped and not flat. You may be able to get away with cutting a jump ring with flush cutters if you make the cut, and then turn the jump ring around and clip the notched end with the flush side. This will create two flat ends, although the ring will then be a little out-of-round and there is no guarantee that the angles will be the same on both ends.
Torches
Most jewelers use expensive oxy-propane or acetylene torch setups to solder their jewelry. The heat from these torches can be carefully controlled and they can get hot enough to melt a crucible of silver to be cast. They also have a variety of different tips available that can be used for the whole spectrum of soldering tasks.
Smaller items, such as jump rings, can be soldered with a small hand-held butane torch the kind that can be purchased at hardware stores or kitchen shops (for torching crème brulee ). These torches are inexpensive and convenient for jump rings and small items, but not hearty enough for production work or soldering complex items that require multiple solderings . It is more difficult to control the heat, and they vary from one brand to another, so you should practice with the one that you are going to use and try to determine where the melting point is with your particular torch.
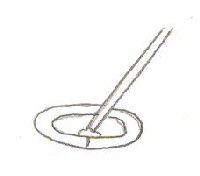
To use the torch, ignite it and then adjust the flame to about ½. The hottest part of the flame is actually just beyond the tip of the blue part of the flame. This is generally the part of the flame that you want to use on the solder joint, but if your torch is particularly hot, you may have to hold the torch a little farther away to get the heat right.
(Excuse my quick and dirty drawings...I will try to do some better ones when I get time)
| Soldering Jump Rings with Sheet Solder |
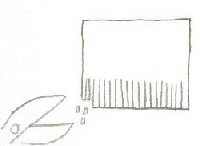 |
Prepare the extra-easy sheet solder by using tin snips to cut it into tiny chips, smaller than 1mm square. Cut the sheet several times in one direction and then turn it the other way and cut across the strips to get the chips. Save all the solder chips in a special container and be careful to keep them from getting contaminated or mixed with other types of solder. The chips should not be too big; any solder that can not fit into the joint will glop up on the outside of the joint, so the idea is to use exactly the right amount to fill the entire joint, but no more.
|
| If you plan to solder a chain of rings, solder half the rings individually first, and then go back and solder them together with the connector rings. This is because it's a little easier to solder individual rings than rings in a chain. |
 |
Open the jump ring and brush flux on both ends with a small paintbrush. Do not use too much flux or it will bubble up during the heating process and may knock the solder chip out of place. |
 |
Use pliers to close the jump rings so that the ends butt up against each other perfectly. |
 |
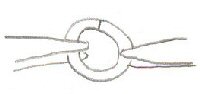
Lay the jump ring on the charcoal block so that the joint touches the block. Use a set of third hand' tweezers to help hold it in place if necessary. |
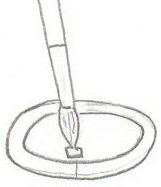 |
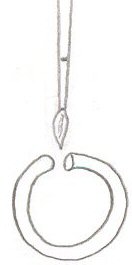
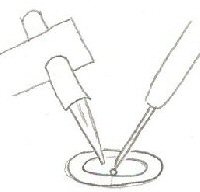
Use the tip of the paintbrush to pick up a chip of solder and place it on top of the joint. |
 |
Turn on the torch and begin to heat the jump ring and the charcoal under it. The objective is to heat the ring and not the solder, as the solder will flow into the hottest part.
Watch carefully for the solder to melt and then flow. When it begins to melt, it turns to a liquid look. The next step after melt' is flow'. When this happens, it happens very fast.
As soon as the solder flows, immediately remove the heat.
Place the item that has been soldered into the pickle and leave for a few minutes. If you are soldering a chain of rings, there is no need to pickle until you have finished all the soldering.
Remove from the pickle with copper tongs and rinse with water. |
Considerations for soldering rings in a chain
When soldering several rings together in a chain, watch the heat as you solder, and if the solder doesn't appear to be melting in a timely manner, pull the heat away and re-evaluate. If you overheat one of the rings, it could cause one of the adjacent rings to become hot enough for its solder to melt. This could cause the joint to come unsoldered, or allow one side to sag a little so that the joint is still soldered but the ends no longer meet cleanly.
|
| Variations on using sheet solder |
|
|
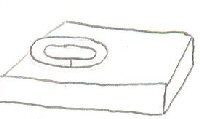
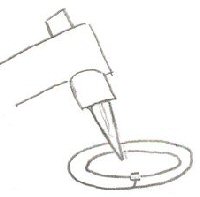
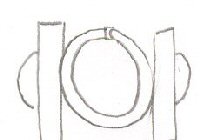
Instead of placing the solder chip on top of the joint, some people prefer to place the chip on the board and lay the jump ring on top of the chip, with the joint right above the chip. Then when you heat the jump ring, the solder will flow upwards through the joint towards the heat. |
Pick Soldering
|
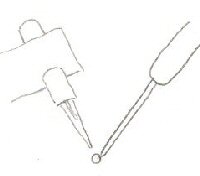
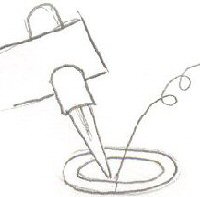
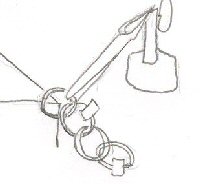
Place a solder chip on the board by itself. Use the torch to heat the end of a solder pick until it glows. Then touch the end of the pick to the chip. The chip should melt into a ball that sticks to the end of the pick. Next, heat the jump ring and when you feel that it is sufficiently heated, touch the solder ball to the joint and it should melt and flow down into the joint. This method is preferred by a lot of jewelers because they can place the solder exactly where they want it. |
Placing the chip in the joint
 |
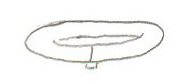
Flux the joint, use pliers to close the ring, and then open the ring slightly and slip in a chip of solder. Then heat as usual. This can make a cleaner joint since the solder is already in the joint to begin with, but is more time consuming. Some people who use this method make a jig designed to squeeze the jump ring closed as the solder melts, ensuring a tighter fit.
|
| Using wire solder |
|
 |
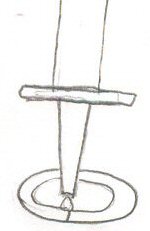
Wire solder is sometimes used by heating the jump ring and then touching the end of the wire to the joint. Ideally, just the right amount of wire should melt and flow into the joint. This takes a little practice, as if the heat is not controlled carefully, too much of the wire can melt and glop up on the jump ring.
Others prefer to cut a tiny piece of wire and use the same methods as for chip soldering.
|
Note on solder glops: Sometimes a little of the solder can be removed by heating the end of a solder pick and touching it to the solder, causing some of the solder to flow onto the pick.
|
| Using Paste Solder |
|
 |
Paste solder comes in several forms. Many types of paste solder contain their own flux and do not require the use of extra flux. Some brands of paste solder come in a syringe and may be applied directly to the joint from the syringe. In other cases where the solder comes in a jar or a syringe that is too big for the item being soldered, a small dab of the solder may be applied to the joint with a toothpick or paintbrush. The solder is applied at the top of the joint and soldered in the same way that you would use a chip of sheet solder.
|
Soldering Jump Rings with Glass Beads
|
Special consideration must be given to soldering jump rings with glass beads. First, ensure that the beads really are glass and not any kind of plastic or resin that may look like glass. Second, make sure the beads are high-quality glass beads that have been annealed properly. All glass, some more than other, is susceptible to thermal shock. If the bead is heated or cooled too rapidly, the outside may heat or cool at a slower rate than the inside, and this stress could cause the glass to crack. The bigger the bead, the more likely this is to happen.
|
 |
Use the easiest solder you can find, so that you can solder with the least amount of heat.
If not all of your jump rings have glass beads, solder the ones with the beads individually first. Prop the jump ring on the corner of the soldering block, with the joint touching the block. Position the jump ring so that any adjoining rings are as far from the heat as possible. Use third-hand' tweezers to hold the ring in place.
|
When heating a jump ring that has a glass bead, take special care not to aim the heat directly at the glass. Also take care not to let the jump ring get too hot. This means that if the solder is not melting as fast as it should, remove the heat and try to determine why. Allowing the jump ring to get too hot will overheat the glass.
|
Do not use heated pickle solution and allow the piece to cool off sufficiently before dropping it into COOL pickle solution.
|
For pieces with very expensive glass components, cooling solutions are available that may be used to coat the item that you don't want heated. Many of these come in a gel form and may be spread over the glass and do a good job of keeping the glass from overheating. However, these coolants are not really cost-effective if you are doing a large number of pieces with glass.
Water bowls are available with attached tweezers that can be used to keep everything under water except the part that is being soldered. These do a good job of protecting the piece, but they make the piece more difficult to heat and the soldering process takes a lot longer. |
Finishing
Jump ring chains and bracelets can be tumbled with stainless steel shot to polish and reduce nicks and scratches. The polishing should smooth out the solder a little and make it less evident. Tumbling will also harden the wire so that the jump rings will be stronger.
Home Back to tutorials page